Sunday, March 1, 2015

Winter Blues - Part 2 (or I hate snow)

After posting Winter Blues - Part 1, I thought it would be good to post what I think of snow now.

Ya, it's pretty now...

More snow, this is getting deep and I'm starting to have problems moving the snow. My back is starting to ache.


The Hydrangeas are slowly disappearing

The cold has frozen a 6" ridge of sharp, frozen ice at the end of the driveway left courtesy of the plow driver. Of course, after I finished shoveling. I think they wait for everyone to finish clearing before they go by. And unclear.


Drifts everywhere

When I walk through the snow it gets into my boots and thaws around my feet. Ya, that's such a great feeling. I curse.


The snow was falling so fast it looked like tracers from the clouds.

It's like it will never stop. Storm after storm.


More Practice than I needed

The snow blower throws the snow to the wind.The wind then catches and blows it all back in my face making me think this must be what the North Pole is like.


The Garden Angel has become a Snow Angel

It's so freaking deep now I can't see anything in the yard. I wonder if the deck will collapse from all of that "pretty" snow.
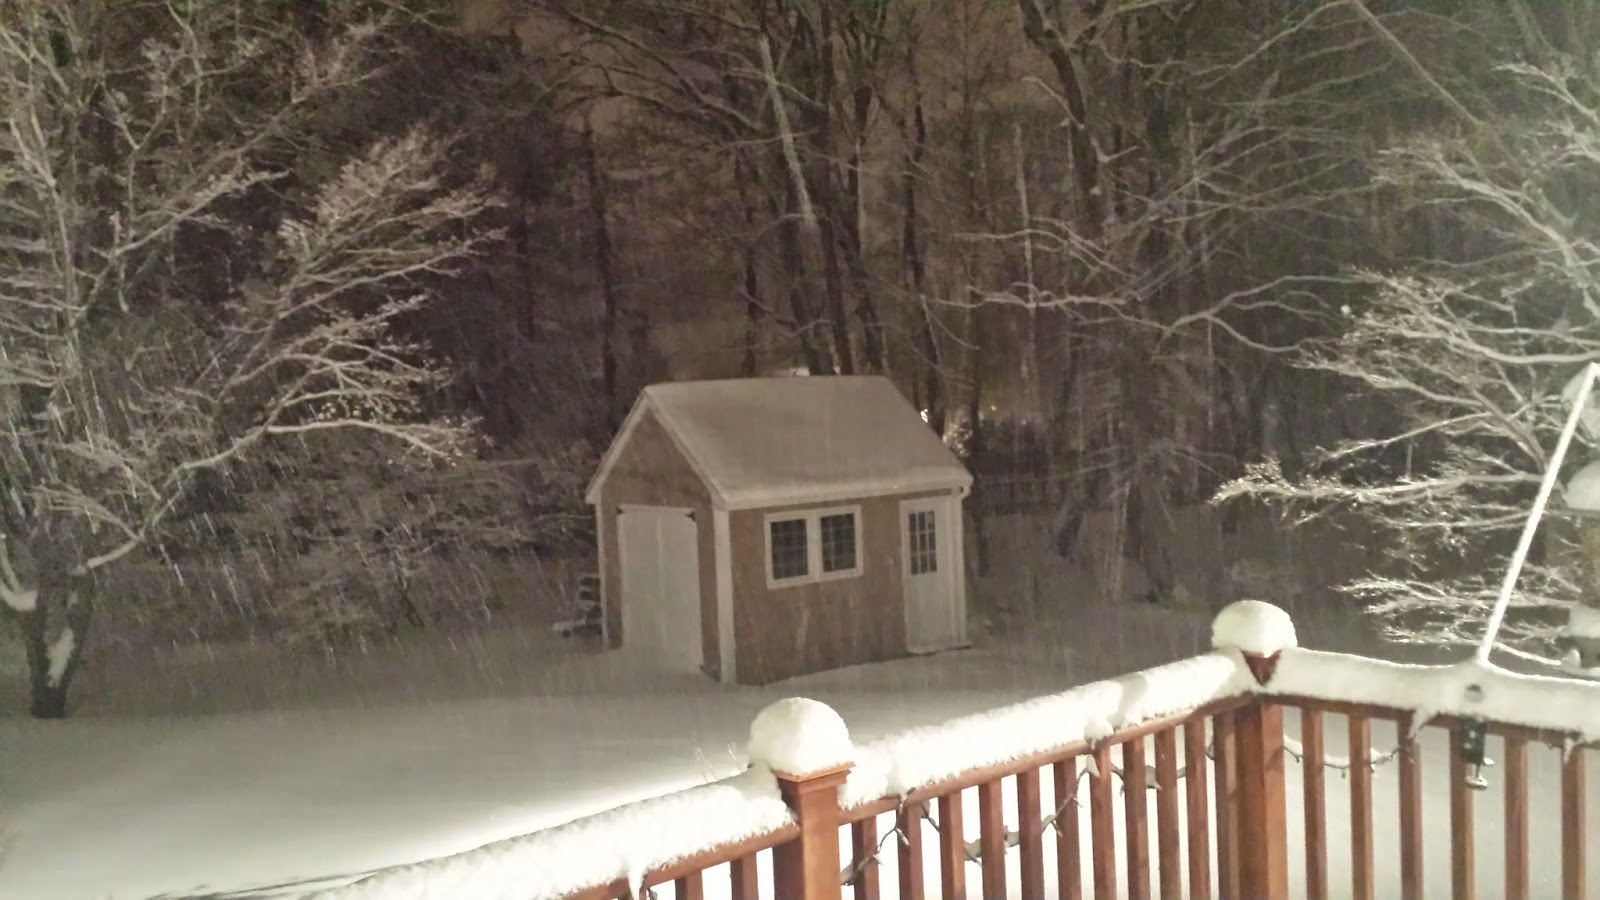

Another night, Another Snow storm

The newspaper is no longer skittering across the snow. It burrows under the new snow, completely disappearing in the driveway. I find it later with the snow blower which shreds it and blows fresh confetti everywhere.


A "Small" Snowdrift on the Deck.

The snow mounds along the drive way are now shoulder high forcing me to lift the snow over my head to add to the ever growing pile. My shovel is breaking. So is my back


Heavy Slush

We have a temporary thaw. Moving the slush around is like shoveling cold oatmeal. And its three times as heavy.


More Drifts

We now have no where left for the snow drifts to go during each storm. So they build new ones on the porches. Everytime it snows.


I had to get this Shot of the Icicles on my Neighbor's House.
We call them "Widow Makers"

My gutters are frozen solid with shear walls of ice sitting 6 inches higher than the gutter. Icicles look nice on Christmas cards. Not roofs. Companies are charging around $80 per worker to clear roofs. You'll usually see about 5 of them on a roof. And it takes hours to clear.


It Looks Nice. Until the Sun Comes up

The roads are dirty. My car is a mess. My garage floor is covered with chunks of dirty, icy water.


You can see the Driveway Markers on the Side of the Driveway.
Then they disappeared.

The plow driver comes in the middle of the night doing his job. Leaving work for me.


The Falling Snow even Blots Out the Streetlight

Everything disappears underneath piles and piles of the white stuff.


Some folks have heated walkways to melt the snow. Not us.

We have no where left to put it.

Yay! This is Fun. No it's not...
I've had to do this so many times that I don't know which 
storm this was.

My neighbor doesn't mind that I blow the snow towards their driveway. I clear their's too.


Our Neighbors Over the Border

Seems like the only fun to be had is by the creative folks on the Internet.


Even the Game Shows are Getting in on it.

Funny. Who thinks of these things?


What the Day Brings

It wouldn't be so bad if it would melt. But it's been too cold.So it just sits there waiting for the next storm to pile on more.


Wishing for spring

The Hydrangeas have all but disappeared.It so cold the snow on the roof isn't even melting.

Look! Even the Weatherman Looks Unhappy.
We're at the bottom of the 6". Um, that's 6" of more snow.

On Saturday night, the local weather was saying that we we're going to get another 3" - 6". It's now snowing and I know I'll be shoveling it all before I go to work.

But Wait! There's more!

Tomorrow morning there will be 6" of new snow. And now they are saying there will be another storm on Tuesday! That's it. I'm done. I've had enough.

I hate snow. And the cold. I hate that too.

Enjoy your week. I'll probably be shoveling. Or maybe I'll build a snowman. Or an igloo.

Wednesday, February 25, 2015

Winter Blues - Part 1

Our first snow.

I love snow.

Seeing that we've managed to get this winter's snow all at once, I thought I'd write about it. In two parts.

It's early in the morning and looking outside I see that it's snowing. Again. With half dollar sized flakes, gently coming down. Watching it fall makes me reflect on the snow that we've received over the past month.

A light dusting.

The cold early morning air hits your lungs andmakes you feel alive.


Early morning snow.

The falling snow takes away all the noise making everything peaceful. It seems like you can actually hear the snow land on the ground.


You can still see the blades of grass.

The sound of snow crunching under foot where you never heard anything before.


Coated trees give them the look of a black & white picture.

The first snow falling coats everything with a covering of white changing the way everything appears. It looks like white brush strokes from an artist.


The Snow makes the House Glow.

The early morning newspaper leaves tracks as it skitters across the snow.


Cleaned Walkways leave a Pattern in the Bluestone.

I enjoy shoveling snow. It gets me outside and the exercise of moving snow feels great.


The Garden Angel is Surrounded.

A little more snow. This is great. Everything looks so fresh. I'm enjoying this.


A Pic from my Sister in Atlanta. They're having a "Blizzard"
They have a lot of catching up to do.

So there you go. A little snow. A little exercise. It's all good. That is until the snow didn't stop.

Next time - Winter Blues - Part 2 (or I hate snow)


Monday, February 9, 2015

Landscaping - Part 1


As I sit here watching the snow come down on our third Monday with a significant snow storm, it seems like last spring was so long ago. It was then that we started working with Brooke Merriam from Sunflower Designs to design the landscaping around our new home. 

Landscape Plan - Overview
Who knew there were so many plants to pick from?

I’m happy that we hired Brooke because it’s one thing to change some plants around in existing landscaping. It’s an entirely different thing to start with nothing and go from the ground up. Wait. Let me correct that. We started with mud.

North side Overview


North against the house
We ultimatley went with hostas and another plant who's name escapes 
me because of the deep shade from the house.

North along the Property line
We were looking for some privacy between the houses.
Three River Birches along with tall Switch Grasses will help with that.

Brooke guided us along by listening to what we thought we would like and then provided us with a number of plant suggestions. We knew immediately that we didn’t want any large arborvitaes in front of the house. I think these are always sold as low maintenance plants. Too often though, they get no maintenance and wind up being nothing but thick woody plants. We instead wanted low bushes like hydrangeas, azeleas and red twig dogwoods and different types of grasses. Plus I had my collection of daylillies to spread around.

Front of House. West Facing.
We went with a lot of low plants like Japanese sedges and Dwarf Fountain Grass. We also added a great looking Hinoki Cypress and Columnar Sweetgum tree.


Southwest corner of  the Property.
We added a dogwood and created a small island of red twig dogwoods 
and grasses. Plus we had a couple of large rocks to find homes for

When we got closer to plant selections she then suggested that we head out to the nursery to see the plants up close. This was a great idea as it helped us switch some plants out with others that we found that we liked a little better. And of course, we also added plants that we “discovered”.


South side of the House
Hydrangeas along the walkway and porch. Grasses under the Dinning Room window.
We dropped the idea of a side patio once the back patio was completed.
We figured we could always add it later.

The other great part was that we were able to tag the plants that we handpicked for our yard so we knew exactly what we’d be planting. The downside is that it is very easy to get carried away. We picked out a large kousa dogwood that in our heads was easy to justify the $900 that it was going to cost. I think it was because we were still in mourning over the one tree, a large kousa dogwood, that we had tried to save. 

Pathway along the Side of Garage
We changed some of  the plants once we started planting this area.
We kept low plants along the wall and added medium size hostas along the
garage wall.


Later, after adding up the charges, we decided it would be more fun to watch a less expensive, smaller dogwood, grow.


Patio
Lots of low border plants and a great looking Columnar Hornbeam

The nice thing about having a plan was that it was easier to make decisions. I think if we didn’t at least have something on paper, we’d still have nothing but mud. With snow on it. 

Patio
We're happy that we kept a plant area on the inside corner of the patio.
It was a perfect location for a Hino-Crimson Azalea along 
with Japanese Forest grass.

Also, Brooke was really good about listening (and putting up with my sense of humor – at one point I told her we were ditching plants and going with a crushed stone yard to keep down the maintenance) and finding plants that she thought we might like. Now it was on to finishing picking out the plants and start with the planting.

Next - Landscaping - Part 2. Or maybe a bit about all of this snow.


Saturday, January 24, 2015

Painting the Basement Floor & A Little Snow

Early Morning Snow
Our first of the Year

We had our first real snow of the season early this morning. It left about three inches of heavy wet snow. Knowing that it was going to turn to rain, we turned on all of the lights and opened the blinds at 6.30 in the morning so I could go out and grab a couple of pics.

Front of the House
Yes, I know I haven't done the big reveal yet so consider these a teaser.

Side View
If the Neighbor's had been awake, they would have thought that 
we were crazy with all of the lights on first thing in the morning.


After the walls were done being painted, it was time to tackle the floor. This turned out to be a lot of work. The floors have to first be really clean. With all of the construction going there was a lot of debris that had to be removed. And I don't mean large stuff. There was a bunch of dirt particles and sawdust that had been left behind.


Using the Squeegee to Push the Excess Water to the Sump Hole

So first, after sweeping three times (or was it more?) followed by vacuuming, I hosed the floors down multiple times with clean water and scrubbed them at the same time to remove the loose dirt. I used a squeegee to push the water towards the sump pump hole that I had lined with towels to capture the dirt that was mixed with water from the floor. I didn’t want fines (small dirt particles) blocking the holes or coating the crushed stone beneath with mud.


Sump Lined with Towels to Catch the Dirt
I replaced and rinsed these often because of all the mud they would hold.

After all of the cleaning it was time to to go onto the next step. In order to have the paint stick better, it requires that you etch the concrete. Basically, concrete floors are smooth and they need to be rough or else the paint will peel right off. You can have it done mechanically with a grinder or you can use an acid solution. I went with the solution.

Etching Solution
I used a Watering Can to Sprinkle it on the Floor.

After letting it all dry, I used the etching solution, which is mixed with water to etch the concrete and make it rougher. 


It Foams when you First Apply it.
The container said wear protection because it will burn. Being a guy, I didn't. 
It burned. Then I put Rubber Gloves on. It no longer burned.

This is hard work as you really need to apply the solution and scrub the floor multiple times. But of course, hard monotonous work is a great time to think. You know, like pondering the great mysteries of the universe like “will I hit PowerBall soon?”


Rinsing Off the Solution

I divided the basement up into sections to make it easier to keep track of the areas that I had already scrubbed. This is work not to be taken lightly. It takes multiple deep scrubbings with good rinsings in between. Once it had dried after each scrubbing, I would rub my hand across the floor to see to see if it was rough and if there were any powdery residue left behind.


You can see the Roughness
OK, maybe you can't.

Painting was straight forward on most of the floor. Like the walls, I used the Seal-Krete epoxy on most of the floor with the exception of the area where my shop is going to go. My plan is to use the heavier two part epoxy in the shop area because of the traffic and tools.

Around the HVAC System
I got a little carried away with neatness.

It was quick work with a roller. Like scrubbing, I did it in 4’ x 4’ sections and would roll it in one direction and then go over it in the other direction to make sure I got good coverage. 

Already A Difference
The lower section is the Shop area where I'll use the heavier epoxy.

Wall Meets Floor
You can see the silicon that I used to fill the crack between the two.

One coat was all that I needed. Or wanted to do. Someday we’ll be finishing the basement so this temporary in most of the areas at best. It took the better part of a day to paint the entire floor but the results were immediate. The floor looked great and it gave the basement a finished look.


Finished Product
The walls are actually brighter then they appear with the shadows.

My better half just came by and announced that she was bored. And it’s early. That means she is going to remember chores that I promised to do. No doubt, the more bored she gets the more she’ll start to remember those things that I said I would do long ago. Gotta run. And hide.

Next up: Outside Plantings. Part 1.

Enjoy your week.


Larry

Monday, January 19, 2015

Painting the Basement


Holidays, work, 
life and of course, the Patriots football games (What? We're going to the Super Bowl!) have kept me away. I’ll work on fixing that. Let me check those PowerBall numbers…

Jumping back in time to shortly before we actually saw completion on the horizon, I felt the need to go and start to do some work myself. Truthfully, I was bored and it was too early for yard work (a yard didn’t exist anyways) and I needed something to do. And my better half had said more than once “You need to find something to do. Other than bothering me.” So I did.

At this point, pretty much all of the construction debris in the basement was cleared out. OK, I did that. It was driving me nuts seeing piles of rubble and junk wood. And the basement was dry now that the roof had been on for a while. Note, don’t sweat the puddles that you’re bound to get in the basement during construction. They will dry. Other than moving the water around to help with drying, I also picked up all the nails to prevent rust spots. Ya, it’s the small things in life.


The Dark, Gray-Green Cement walls needed something.


And the unevenness of the colors made the walls look dirty.


Concrete Form Pins

At this point most of the concrete form pins had been knocked off. Thankfully there were only about 2 dozen left. The other 1,000 plus (I’m guessing) had already been knocked off.

After Removal

So I took my 5lb sledge and made quick work of them. The trick is to hit them from the top and bottom. They’ll break off easier than side to side.

And the Floor looked (and was) Dirty as well.


And I Needed Something to do.

So standing in the basement after cleaning it, and thinking it looks dark down here with the dark gray-green cement walls. Hmmm, maybe painting it will lighten it up. And I do need something to do. So off to the big box home store I went.

Outside Foundation Walls with Rubber Waterproofing
Worth the extra cost for future protection

When talking with the friendly paint counter person, the first question they asked was if water was coming in through the walls. If it was, they would recommend the DryLok masonry water proofer paint. Fortunately, they are new walls and even more so, when the walls were put in, we spent the extra money to have the outside coated with a rubber membrane to keep the water out. Just a little added protection.


Seal-Krete Epoxy paint

 So I went with the Seal-Krete epoxy paint for the walls and the floor.

I started first by sweeping the walls down with a large floor broom. They had been up for almost a year so the debris that was attached to them was pretty dry. You’ll need a mask when doing this because of the dust. The next day I swept the floor down and waited another day for the dust to settle before painting.

Starting the Walls

Before painting I went around with silicon to seal the small space between the floor and the wall. My thinking was that it might stop any water seepage from coming up between the two. I’m not sure if it will work but it made me feel better.

It looked Brighter (and Cleaner) Immediately
One coat should be enough.

Painting, while tedious, is easy. The paint, which went on very smooth, is one part epoxy so it only requires stirring. There’s also no trim to cut around so I just rolled away with a regular wall roller with 3/8” nap and a long pole handle. The heavy nap is useful for all of the air pockets that are created during the concrete pour. Also, having a cheap brush around came in handy as well. Honestly though, it’s not worth the bother to try to fill every small hole. You’ll drive yourself nuts and it will take forever. I also wasn't really neat about the wall meeting the floor either. No need to be. And there just isn 't enough time in the world when it comes to being neat on rough concrete.

One coat was enough in my book. The walls looked brighter and they no longer had that dirty look. And I managed to stay out of my better half's hair. For short amount of time anyways.

Next up. Painting the Basement floors.

Enjoy your week.

Larry


Thursday, January 1, 2015

Happy New Year 2015!

Happy New Year!

As 2014 disappears on the horizon, in reflection, I’m thankful that we’re in our new house and are really enjoying it. I’ve met a lot of great folks that were patient and answered my many questions about home construction. And of course I’m thankful for my better half. She’s the one that has to put up with me every day.

 What could be better than Cran-Apple Pie for Breakfast?

Like the other day, when early in the morning I announced to her “I’m just going to warn you that I’m going to be really sick by the end of the day. I think I’m going to have the flu.” Now I’m like most husbands in that we can put up with a lot of things patiently (uh huh). With the exception of being sick. Then no matter what it is, when we get sick we convince ourselves that we must be dying and in turn try to convince our better half’s to agree with us and hang over us in deep sympathy. Ya, we turn into big babies.

She looked at me with those eyes as only a wife can do and said very concernedly and sympathetically, “Uh huh, really? Why do you think that?” I answered “Because my eyes are a little achy and that usually means I’m going to get really sick.”

Three days later, being as compassionate as possible and concerned about my well-being she said, “Um, how are you doing with being really sick? I haven’t seen anything yet. Do you think it’s going to be soon?” As only a wife can do. And I had to smile and laugh. I’m so thankful for her.

Lobster, Goose Island IPA Beer & Korbel Champage for New Years Eve Dinner
Runs a close second to pie for breakfast

I’ll get back to house stuff with pics and how we finally moved in over the next few weeks. In the meantime, here’s wishing that you and your families have a great New Year.


Let’s hope that 2015 brings more peace around the world.


Larry